How to Classify and Organize Uploaded Documents
Choose shipment document types, check upload selections and correct a saved upload’s type with Reclassify.
- ForShipment users who upload or inspect documents, with permission to reclassify uploads; Setup changes also require Setup edit access.
- Task timeAbout 3 min
- Video2:11
- Last checked2026-10-23
Overview
Use Setup to choose the shipment’s expected document types, check Document type before uploading, and use Viewer to correct an uploaded certificate saved as Bill of Lading. Confirm the corrected label and unchanged version on Viewer and Overview.
What you'll learn
- Choose expected document types in Setup
- Check Document type before Upload
- Find a saved upload and compare its label with its contents
- Use Reclassify and verify the corrected label and version
Before you begin
- An existing shipment with access to Overview and Viewer Understand Shipment Overview
- Saved document selections in Setup, or a Shipment admin who can update them Enter Shipment Setup
- An uploaded document assigned the wrong type, permission to preview and reclassify it, and an eligible corrected type without a classification conflict
- For the upload step, permission to upload shipment documents Upload Shipping Documents
Step-by-step guide
Select the shipment’s document types
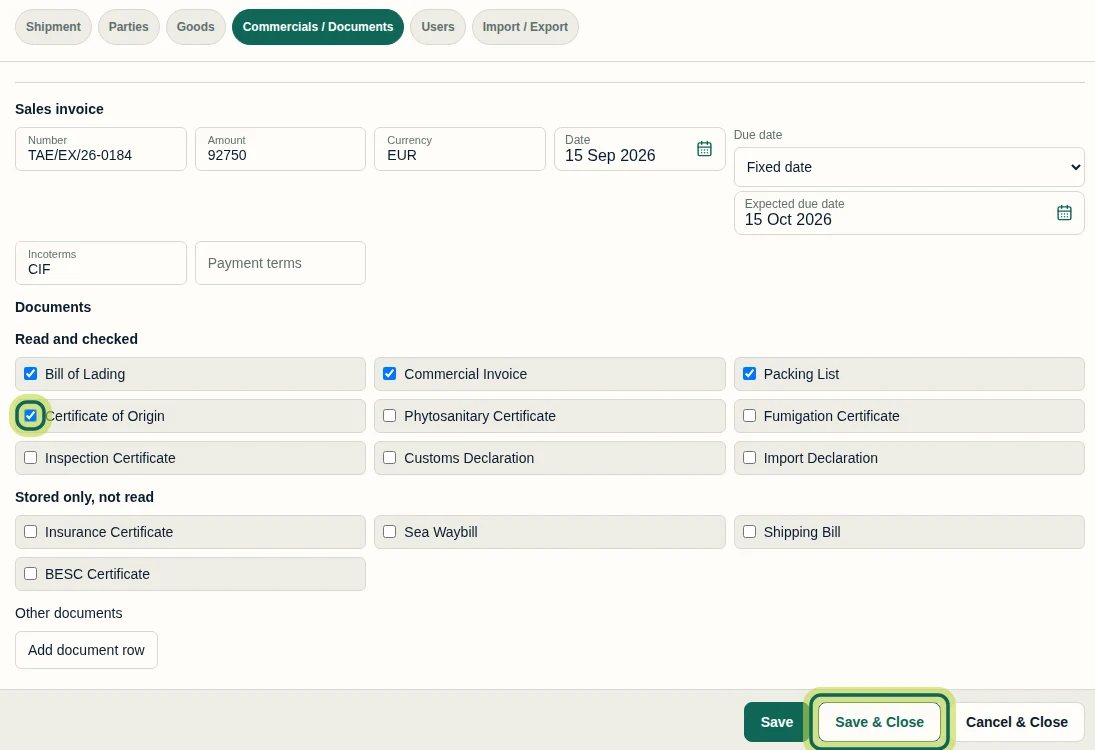
Open the shipment, select Setup, then Commercials / Documents. Tick the required type, such as Certificate of Origin under Read and checked, then select Save & Close. Saved selections determine the upload types available for this shipment. If you cannot edit Setup, ask your Shipment admin to choose the required documents. Available types can differ between shipments.
Step 1 Check the type before uploading
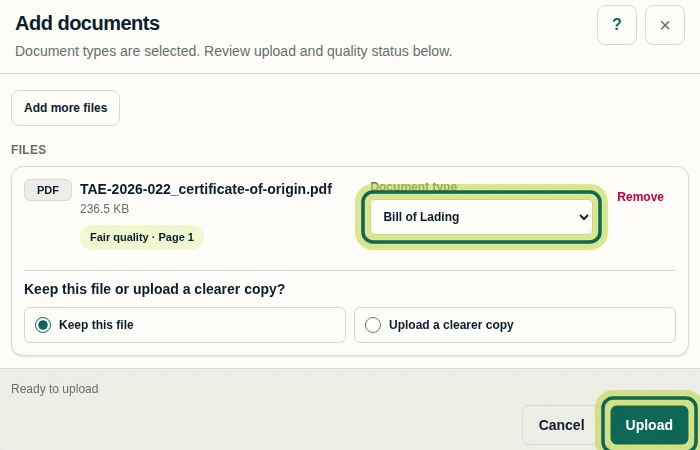
Select Add Documents in the shipment menu and choose your file. In Add documents, check Document type before selecting Upload. In this example, the certificate filename is paired with Bill of Lading, which is the wrong selection. For a certificate, select Certificate of Origin before uploading. The filename does not determine the saved classification. This screenshot shows the incorrect selection; the following steps correct an upload already saved under that type.
Step 2 Find the saved document on Overview
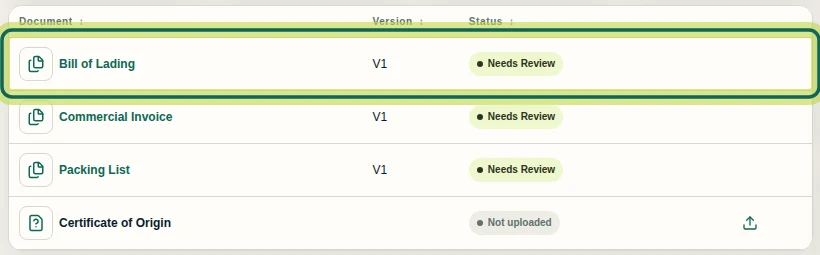
On Overview, locate the saved upload in the Document, Version and Status columns. Use Sort by Document if needed. In this example, Bill of Lading has V1 and Needs Review, while Certificate of Origin is Not uploaded. To check the saved file’s contents, open Viewer from the shipment menu.
Step 3 Compare the label with the document
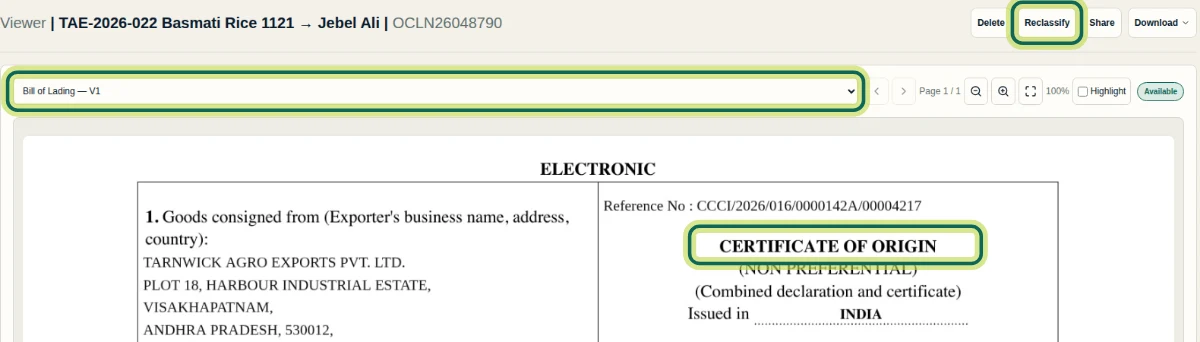
In Viewer, choose the saved upload from the document/version selector at the top. Compare its label with the page: here, Bill of Lading — V1 displays a CERTIFICATE OF ORIGIN. Select Reclassify to correct a wrong type. This requires permission to preview and reclassify the upload; permission may cover only files you uploaded. Deleted documents and documents created in the commercial editor do not offer Reclassify.
Step 4 Save the corrected type
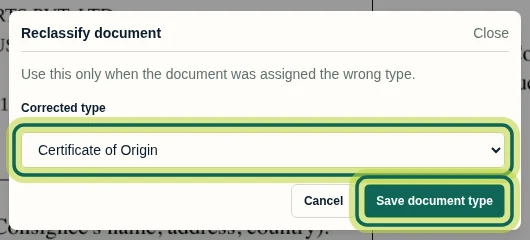
In Reclassify document, choose Certificate of Origin under Corrected type, then select Save document type. Use a type currently selected in the shipment’s saved Setup. Permission and classification conflicts can prevent the change. If Finishing the classification… appears, wait for it to finish and check the resulting label in Viewer. This corrects the existing upload’s type; it does not replace the file, repair its scan or approve its fields.
Step 5 Verify the label and version
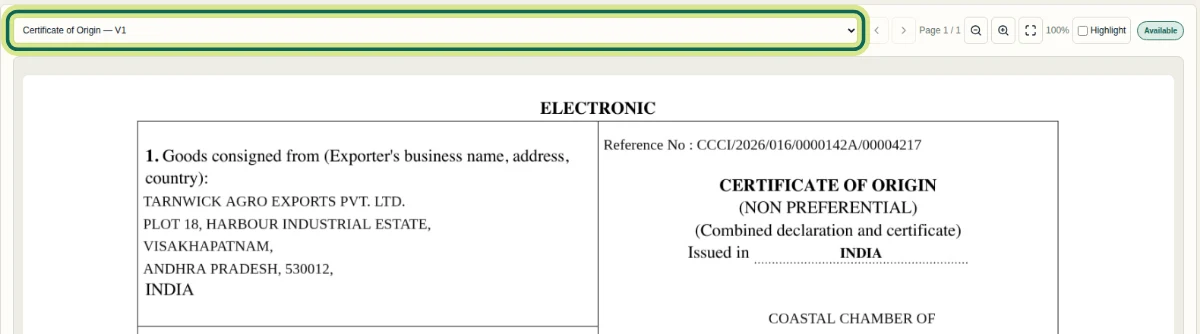
After saving, check the document/version selector in Viewer. In this example it reads Certificate of Origin — V1. The same certificate remains visible and its version is still V1. Reclassification changes the existing record’s type without creating a replacement upload version.
Step 6 Confirm the result and continue to review
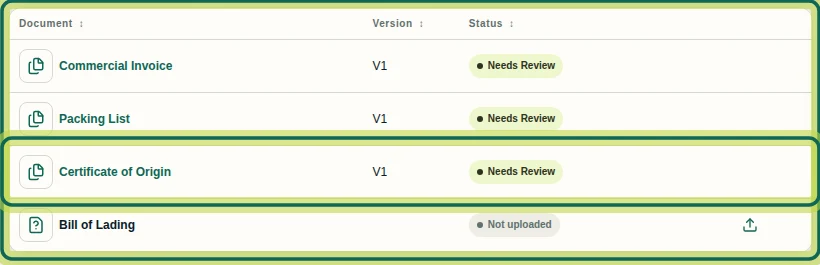
Return to Overview and check the document list. Here, Certificate of Origin is V1 with Needs Review, and Bill of Lading is Not uploaded. The certificate is correctly classified; a Bill of Lading still needs its own upload. Continue with reviewing the extracted document fields. A corrected classification does not mean those fields are approved.
Step 7
Expected result
The uploaded certificate is labelled Certificate of Origin and remains version one. Overview shows Certificate of Origin as Needs Review and Bill of Lading as Not uploaded in this recorded example.
Next tutorial
Was this helpful?
If something did not work as described, tell us and we will help.