How to Annotate Corrections and Generate a Change Report
Place requested corrections, add a note, save the layout and download a change report PDF for inspection.
- ForShipment reviewers preparing correction reports for document issuers
- Task timeAbout 3 min
- Video2:06
- Last checked2026-10-23
Overview
Use Changes to prepare a report from open correction requests. Check the source version, place requested values automatically or manually, add an explanation, and save and generate a PDF. The report records the requests while the source document and open requests remain unchanged.
What you'll learn
- Open a report draft and check its source document version
- Place requested corrections at known fields or manually on the page
- Add an explanatory text note
- Save the layout, generate a report and inspect the downloaded PDF
- Find and download a generated revision later
Before you begin
- A shipment with open correction requests tied to an uploaded document How to Raise a Document Correction Request
- Permission to view correction requests and document fields, prepare and download reports, and preview the source document
Step-by-step guide
Open a change report draft
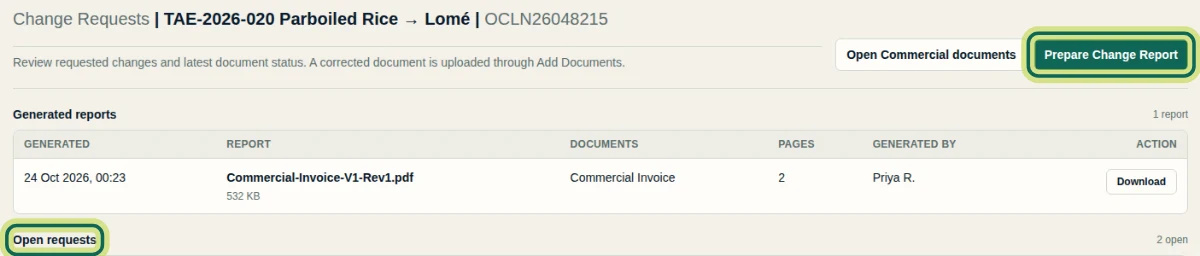
Open the shipment and select Changes. Check Open requests, then select Prepare Change Report. This example uses Net Weight and Package Count requests for the Commercial Invoice. You need permission to view correction requests and document fields, prepare and download reports, and preview the source document. The report records requested corrections; the source document remains unchanged.
Step 1 Continue a saved draft or start a new one
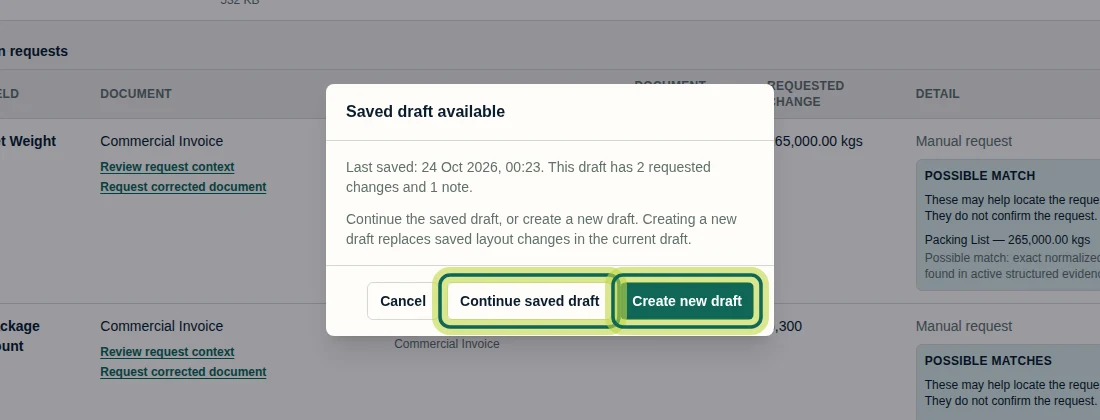
If Saved draft available appears, choose Continue saved draft to resume its saved layout, or Create new draft to start again from the current open requests. Creating a new draft replaces saved layout changes in the current draft. This recording uses Create new draft. On a first visit, the builder may open directly.
Step 2 Check the source version and place requests
In Change Report, check the DOCUMENT selector before placing marks. Here it shows Commercial Invoice · V1. Check the chips under Requested fields, then select Place all at fields. Review which chips change from Not placed to Placed · p1 ✓. Placement depends on a known source location: in this example, only Net Weight is placed automatically.

Step 3 Place a request that has no exact field location
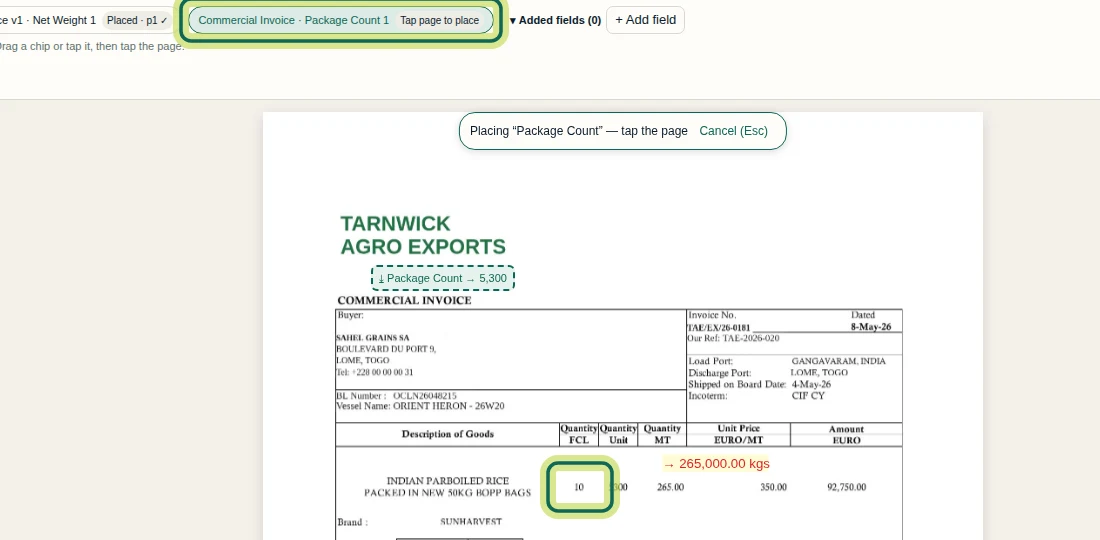
If a request remains Not placed, read the placement message. Here it says there is no exact field location for Package Count. Select its chip; Tap page to place and the placement banner indicate it is selected. Tap near the relevant quantity on the document page, then check that the chip says Placed · p1 ✓ and the requested value appears. You can also drag a chip onto the page. Unplaced items are included in the report's summary appendix, without a mark on a document page.
Step 4 Add an explanatory note
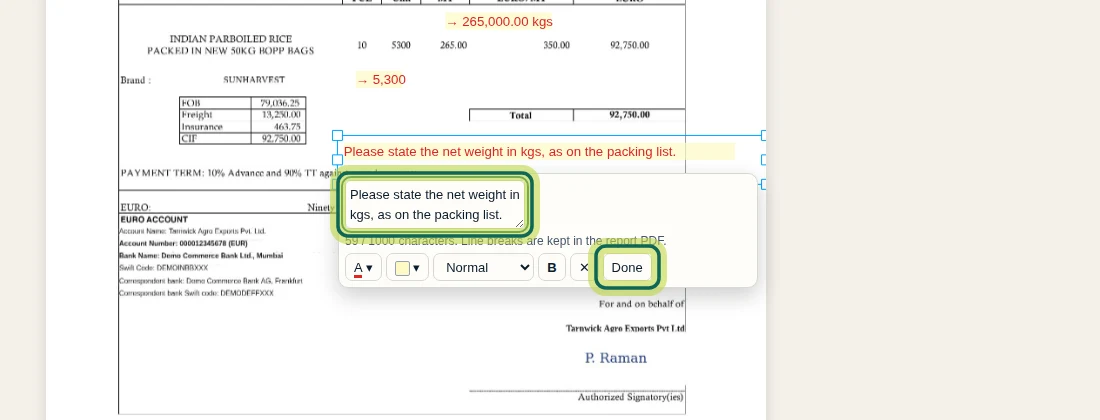
Select T Text, then tap the document where you want an explanation. Enter the note in the Mark text box. This example says, ‘Please state the net weight in kgs, as on the packing list.’ Use the colour, size and bold controls if needed, then select Done. The editor allows up to 1,000 characters and keeps line breaks in the report PDF. Check that the note fits on the page and appears under Added fields.
Step 5 Save the layout and generate the report
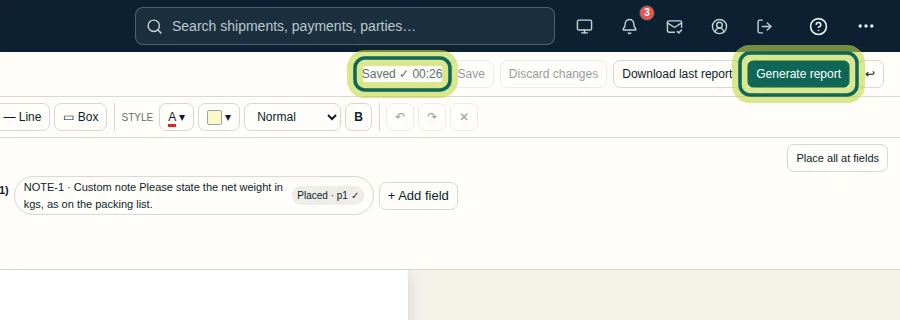
Review the correction marks and note, then select Save while the header shows Unsaved changes. Wait for Saved ✓ with a time, then select Generate report. Generation uses the saved layout. After generating, select Download last report to inspect the PDF. That button can still refer to an earlier report after new edits, so save and generate again before downloading the revision you intend to use.
Step 6 Inspect the PDF and find it again
Open the downloaded PDF and check the correction marks, note placement and Summary appendix. This example has two pages: the annotated invoice and an appendix listing Corrections and Additional notes. Use the return arrow in the builder to return to Change Requests. Under Generated reports, find the intended revision and select Download to retrieve it again. Share the inspected PDF through your chosen communication channel; an in-app report sharing control is not shown. Generating a report leaves the correction requests open. Next, review the corrected document when it arrives.

Step 7
Expected result
A saved report layout and a generated PDF containing the placed correction marks, the explanatory note and a summary appendix. The report revision is available under Generated reports; the correction requests remain open for review of a corrected document.
Next tutorial
Was this helpful?
If something did not work as described, tell us and we will help.