How to Manage Your Own Company Details
Save reusable contact and bank details in Party Master's Own Companies, check the saved record, and choose an issuer bank account in a document.
- ForCompany Owners, Admins and people with permission to maintain their business's Party Master records
- Task timeAbout 3 min
- Video2:19
- Last checked2026-10-23
Overview
The Company page manages the Company account name and shows ownership and users. Reusable business details belong in Party Master's Own Companies. Add a contact and bank account, save each entry, then save and check the whole record before using the bank account in a commercial document.
What you'll learn
- Distinguish the Company account name from reusable Own Company details
- Find and edit your business under Own Companies in Party Master
- Save a contact and bank account, then save the whole Party record
- Check saved details in View Party
- Choose a saved issuer bank account and save the commercial document separately
Before you begin
- Create a Company or join an existing Company before managing its business records. Create Your First Company
- An existing Own Company record and permission to view and edit Party Master. Company account renaming requires separate Company management permission.
- For the optional issuer bank account example, an editable proforma or commercial invoice for this business that uses the current Own Company details (for example, a new invoice).
Step-by-step guide
Distinguish the account name from business details
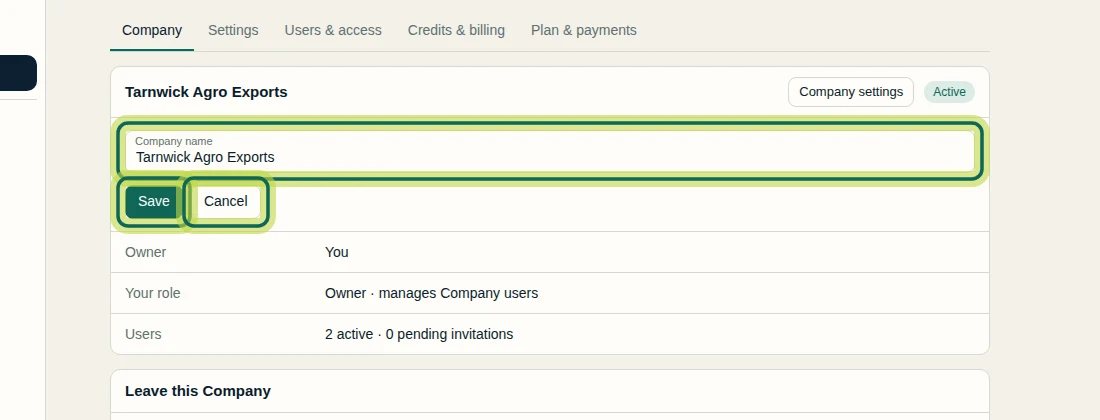
Open Company to check the account name and its Owner, Your role and Users summary. If you have Company management permission, select Rename, edit Company name and select Save, or select Cancel to keep the name. This recording uses Cancel. Manage reusable addresses, contacts and banking details in Party Master; changing the Company account name does not rename its Own Company record.
Step 1 Open your Own Company record
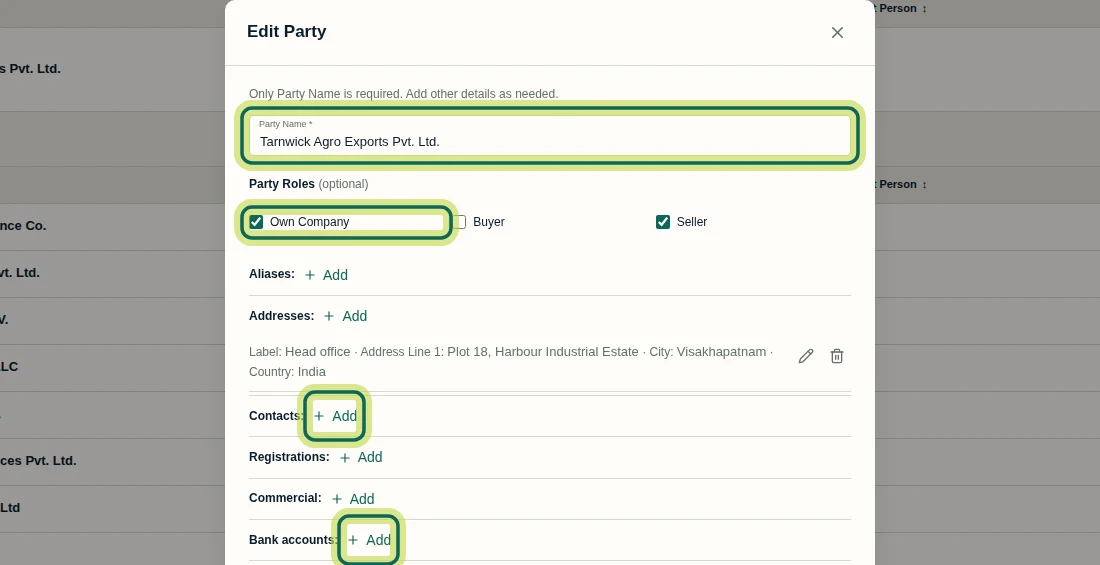
In the Company sidebar, open Party Master. Under Own Companies, find your business and select its pencil icon to open Edit Party. Only Party Name is required; check that Own Company is selected under Party Roles (optional). The example already has an address. You need permission to view and edit Party Master; readers can view records without editing them.
Step 2 Add a contact and save the entry
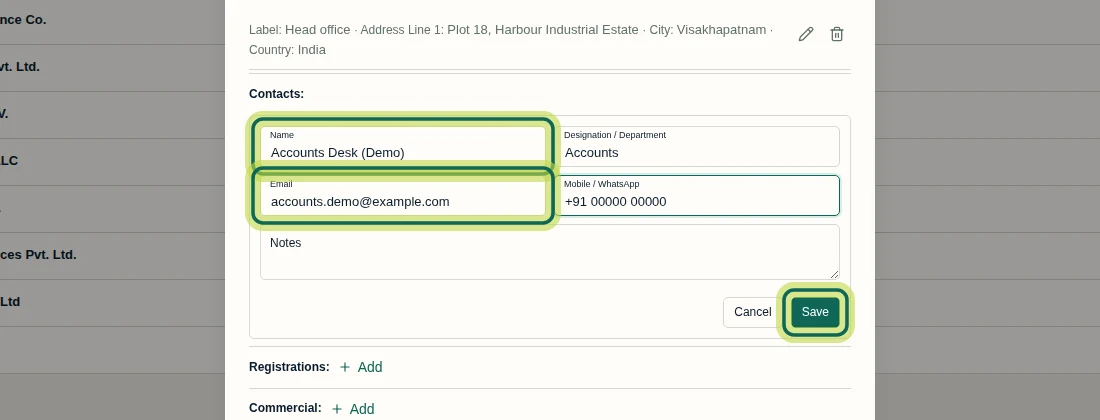
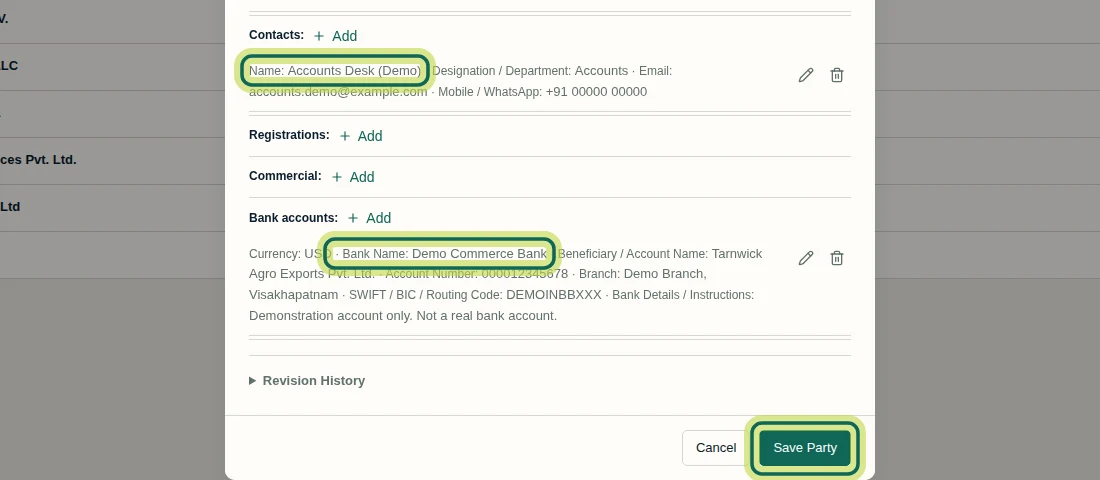
In Edit Party, select Add beside Contacts:. Enter the contact's Name, Designation / Department, Email and Mobile / WhatsApp as needed. Select Save inside the contact entry to return it to a summary. Save Party stays disabled until you save or cancel the open entry; saving this entry is only the first save.
Step 3 Add a bank account and save the entry
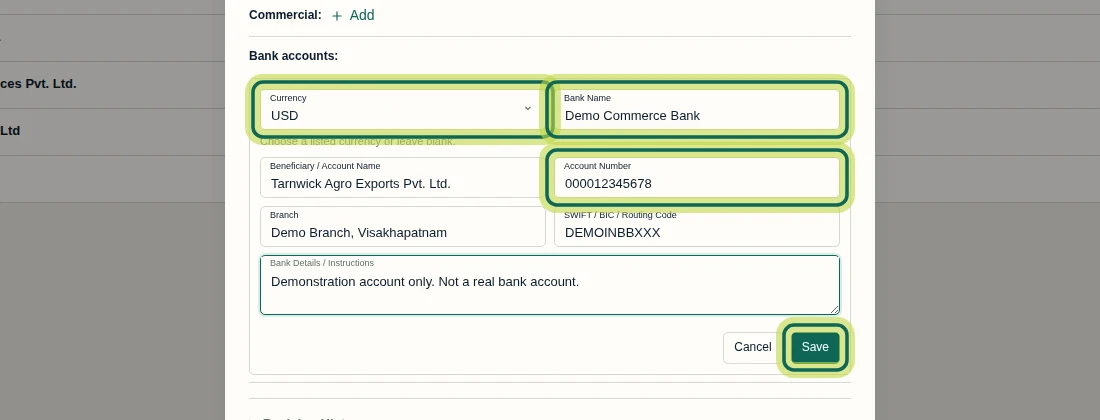
In Edit Party, select Add beside Bank accounts:. Choose a listed Currency or leave it blank. Fill in Bank Name, Beneficiary / Account Name, Account Number, Branch, SWIFT / BIC / Routing Code and Bank Details / Instructions as needed. Select Save inside the bank entry. The displayed account is fictional demonstration data; enter your own business's details.
Step 4 Save the whole Own Company record
After saving each open entry in Edit Party, review the Contacts: and Bank accounts: summaries. Select Save Party at the bottom to save the whole Own Company record. If the footer says Save or cancel the open entry first., finish that entry with its Save or Cancel before selecting Save Party.
Step 5 Check the saved details
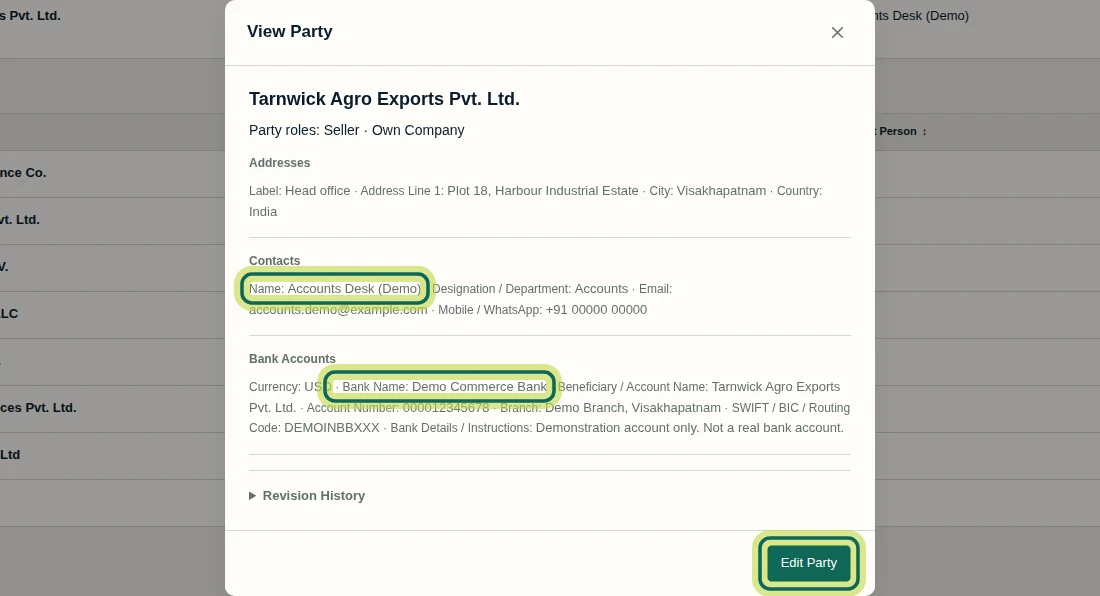
After Save Party, check the saved confirmation in Party Master. In the Own Companies row, select the eye icon to open View Party. Review Contacts and Bank Accounts alongside the address. If you find an error, select Edit Party, correct the entry, save it, and select Save Party again. This recording leaves the Company default unchanged.
Step 6 Use the saved account in a commercial document
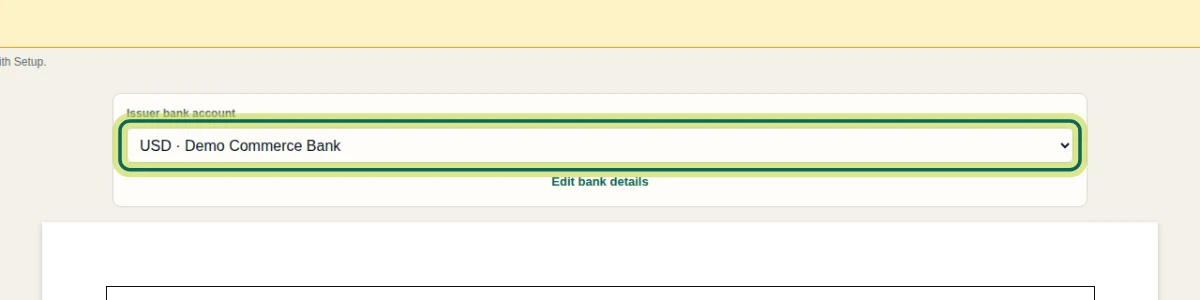
When preparing a commercial document for this issuer, use Issuer bank account to choose the saved account. The example shows US dollars · Demo Commerce Bank selected. Use Save draft to save the document separately. Saving an Own Company record does not mean every bank account or contact field will appear in every document; review the document's selected account and details. The Issuer bank account picker is available in proforma and commercial invoices; an existing invoice keeps the Own Company details it was created with until you choose to use the current details.
Step 7
Expected result
Your Own Company record contains the saved contact and bank account, the details can be checked in View Party, and the saved bank account can be selected under Issuer bank account in a new proforma or commercial invoice, or one that uses the current Own Company details.
Next tutorial
Was this helpful?
If something did not work as described, tell us and we will help.