How to Create and Manage Products
Create a product with reusable details, choose list columns, and edit and check its description.
- ForCompany Owners, Admins and people with permission to manage Company Masters
- Task timeAbout 3 min
- Video2:22
- Last checked2026-10-23
Overview
Create a Product Master record using the required Product Name and Category. Add optional item code, origin, description, HS / HSN code and default unit, then save the record. Choose useful table columns and confirm a description change in View Product.
What you'll learn
- Enter the required product name and category
- Add optional codes, origin, description and default unit
- Save individual entries and the complete product record
- Show item code and origin in the table
- Edit a description and check the saved result
Before you begin
- An existing Company selected in Shiplete Create Your First Company
- Company Owner/Admin authority or permission to view and manage Masters; view-only access does not allow creation or editing
Step-by-step guide
Enter the product details
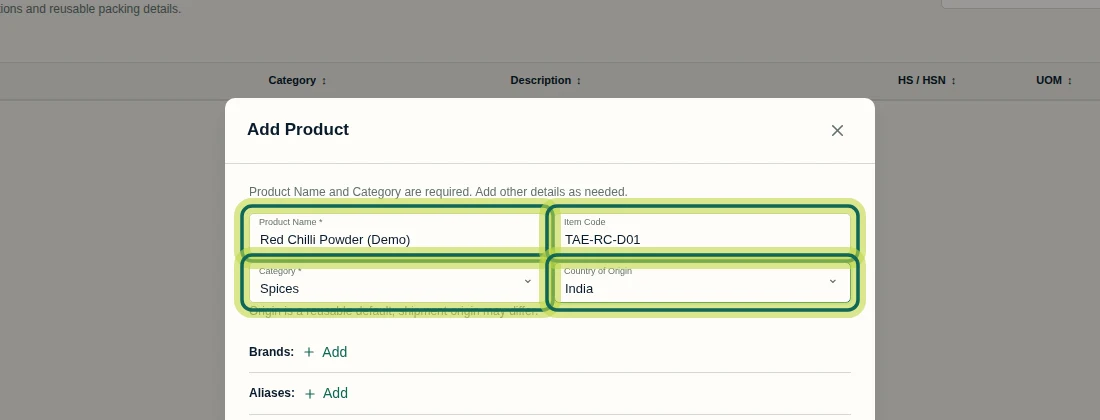
Under Company, open Product Master and select Add Product. Enter Product Name and choose a Category; both are required. The example uses Red Chilli Powder (Demo) and Spices. Item Code and Country of Origin are optional. Origin is a reusable default, and shipment origin may differ; it does not verify the product's origin. Creating or editing products requires Company Owner/Admin authority or permission to view and manage Masters. Users with view-only access cannot add or edit products.
Step 1 Add a description
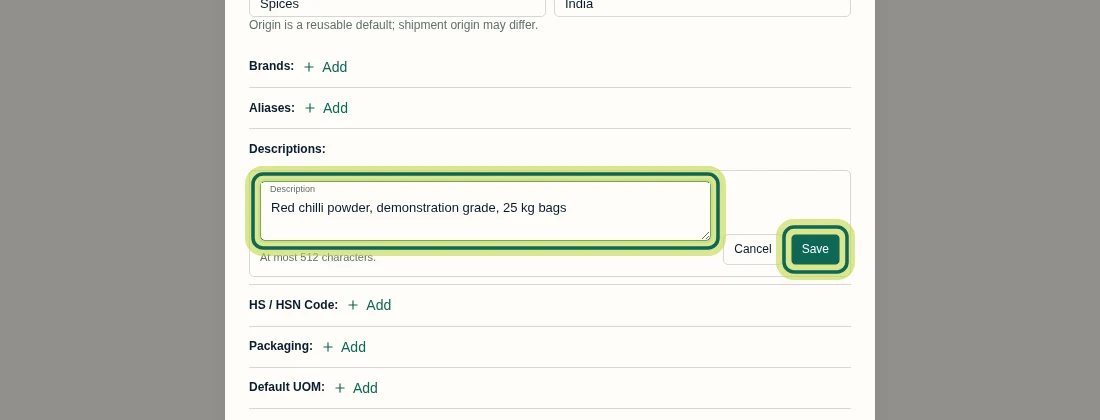
In the product form, select Add beside Descriptions. Enter a Description of at most 512 characters, then select Save beside the entry. The example reads Red chilli powder, demonstration grade, 25 kg bags. This adds the entry to the open form; finish the whole record with Save Product after adding the details you need.
Step 2 Add an HS / HSN code and default unit
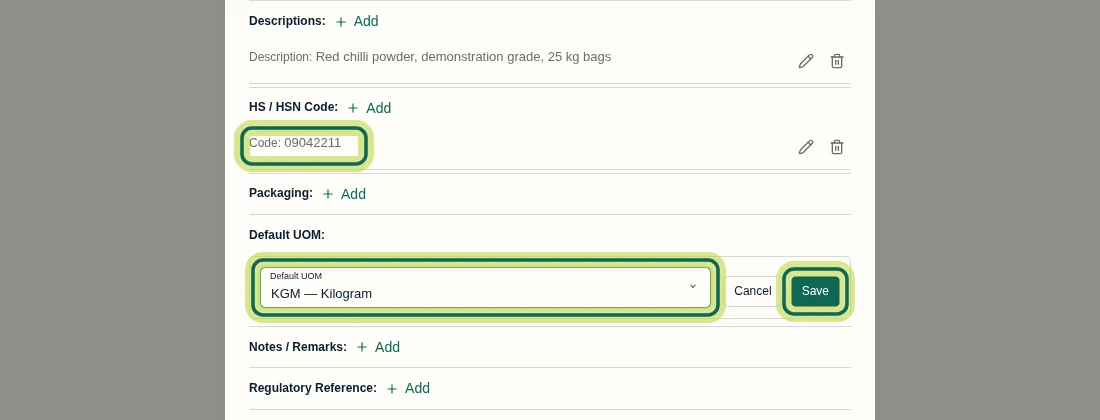
If needed, select Add beside HS / HSN Code, enter the Code, and select the entry's Save button. The recorded value 09042211 is example data, not classification advice. Item Code and HS / HSN Code are separate fields; neither verifies regulatory correctness. To set a reusable unit, select Add beside Default UOM, choose a listed option such as KGM — Kilogram, and select Save beside it.
Step 3 Save the complete product
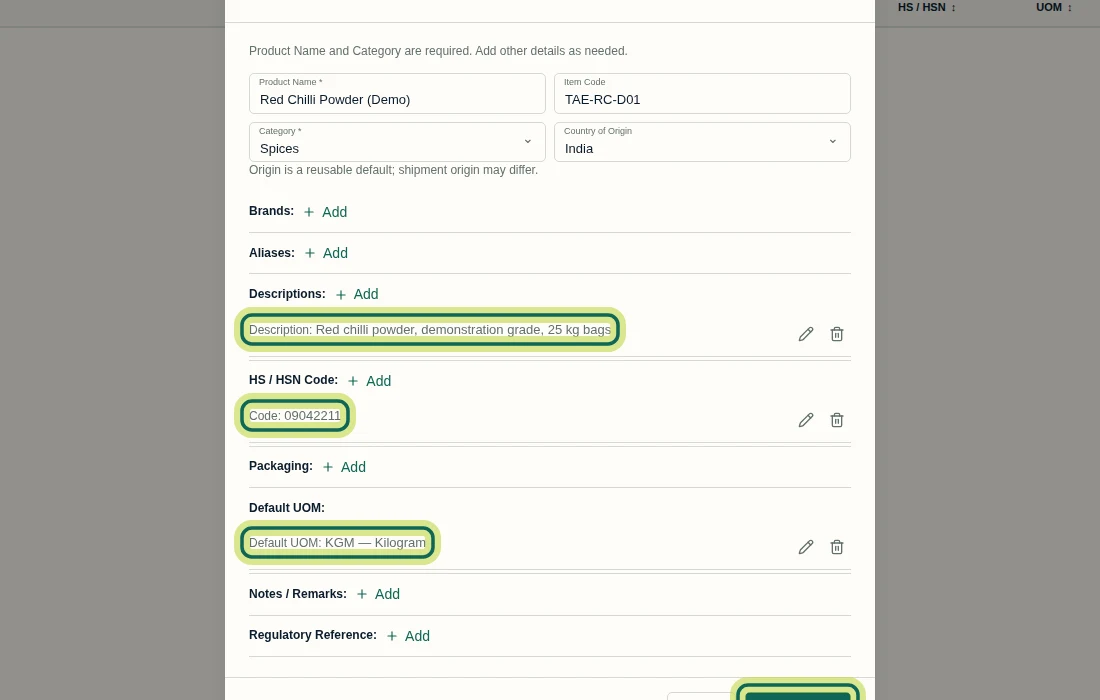
Review the entries in the product form. Finish each open entry with Save, or discard that entry with its Cancel button. Then select Save Product at the bottom. Check for the product's saved message and its row in Products. Saving an individual entry alone does not save the complete product record.
Step 4 Show item code and origin in the list
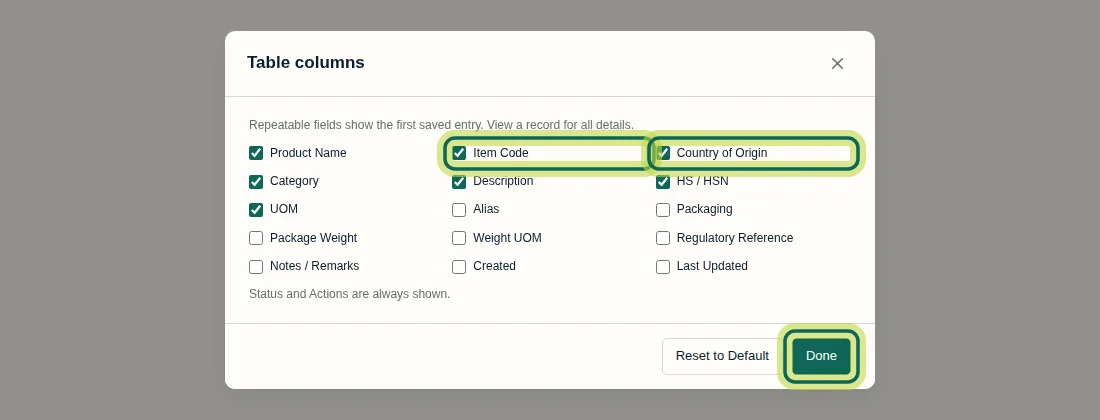
On Product Master, select Columns. In Table columns, tick Item Code and Country of Origin, then select Done. Repeatable fields show only the first saved entry in the table; use the row's eye icon to view all details. Status and Actions are always shown. Use Reset to Default if you want the default column selection again.
Step 5 Edit and save the description
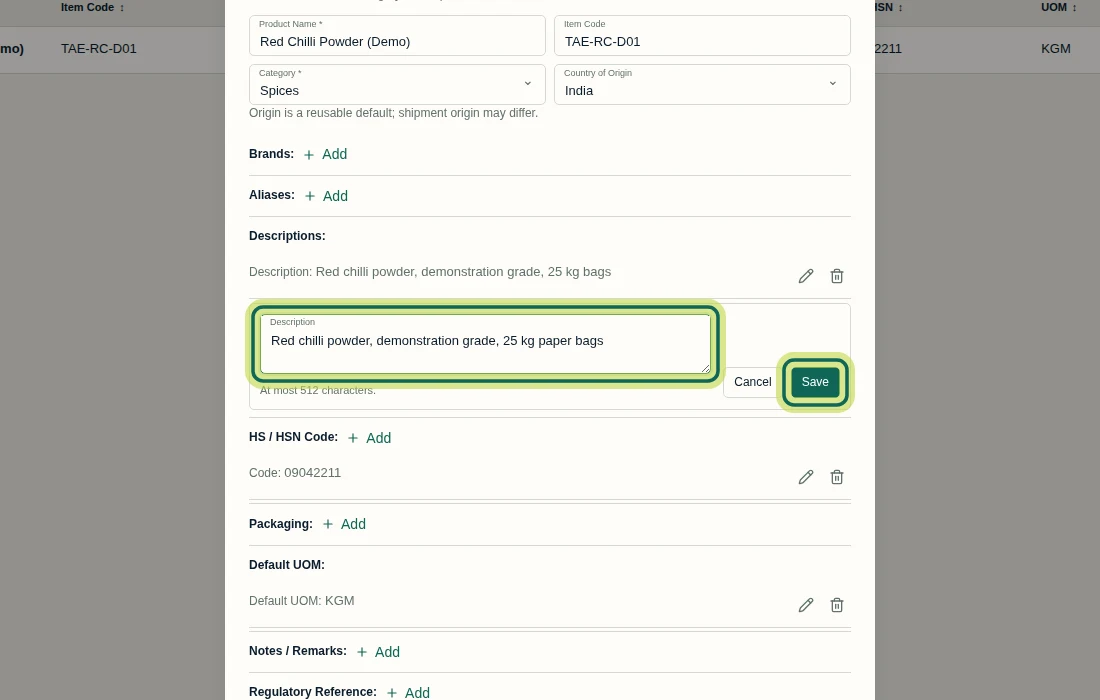
In the product's Actions column, select the pencil icon to open Edit Product. Use the pencil beside the saved description (Edit Description 1) to change that entry. The example changes 25 kg bags to 25 kg paper bags. Keep the Description within 512 characters, select Save beside it, and then select Save Product at the bottom.
Step 6 Check the updated product
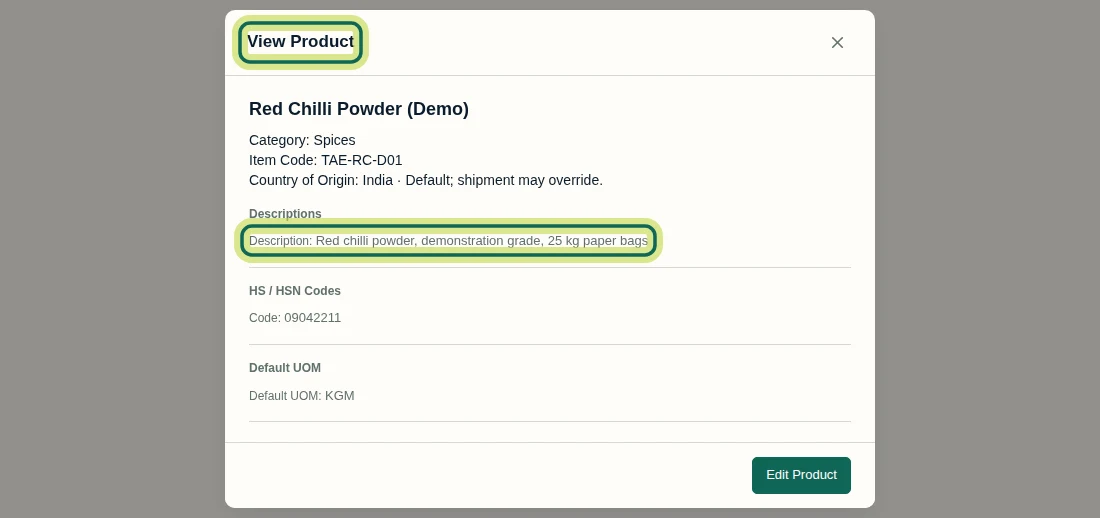
Select the product row's eye icon to open View Product. Check that Descriptions contains the updated wording, including 25 kg paper bags in this example. Edit Product opens the form again if you have editing permission. Changes to a Product Master record do not automatically update values already adopted in existing shipments or documents, and do not maintain transaction prices, quantities, weights or amounts. Next, learn how to use product categories and aliases.
Step 7
Expected result
A product is saved in Products with the chosen reusable details, Item Code and Country of Origin can be shown in the table, and View Product confirms the updated description.
Next tutorial
Was this helpful?
If something did not work as described, tell us and we will help.